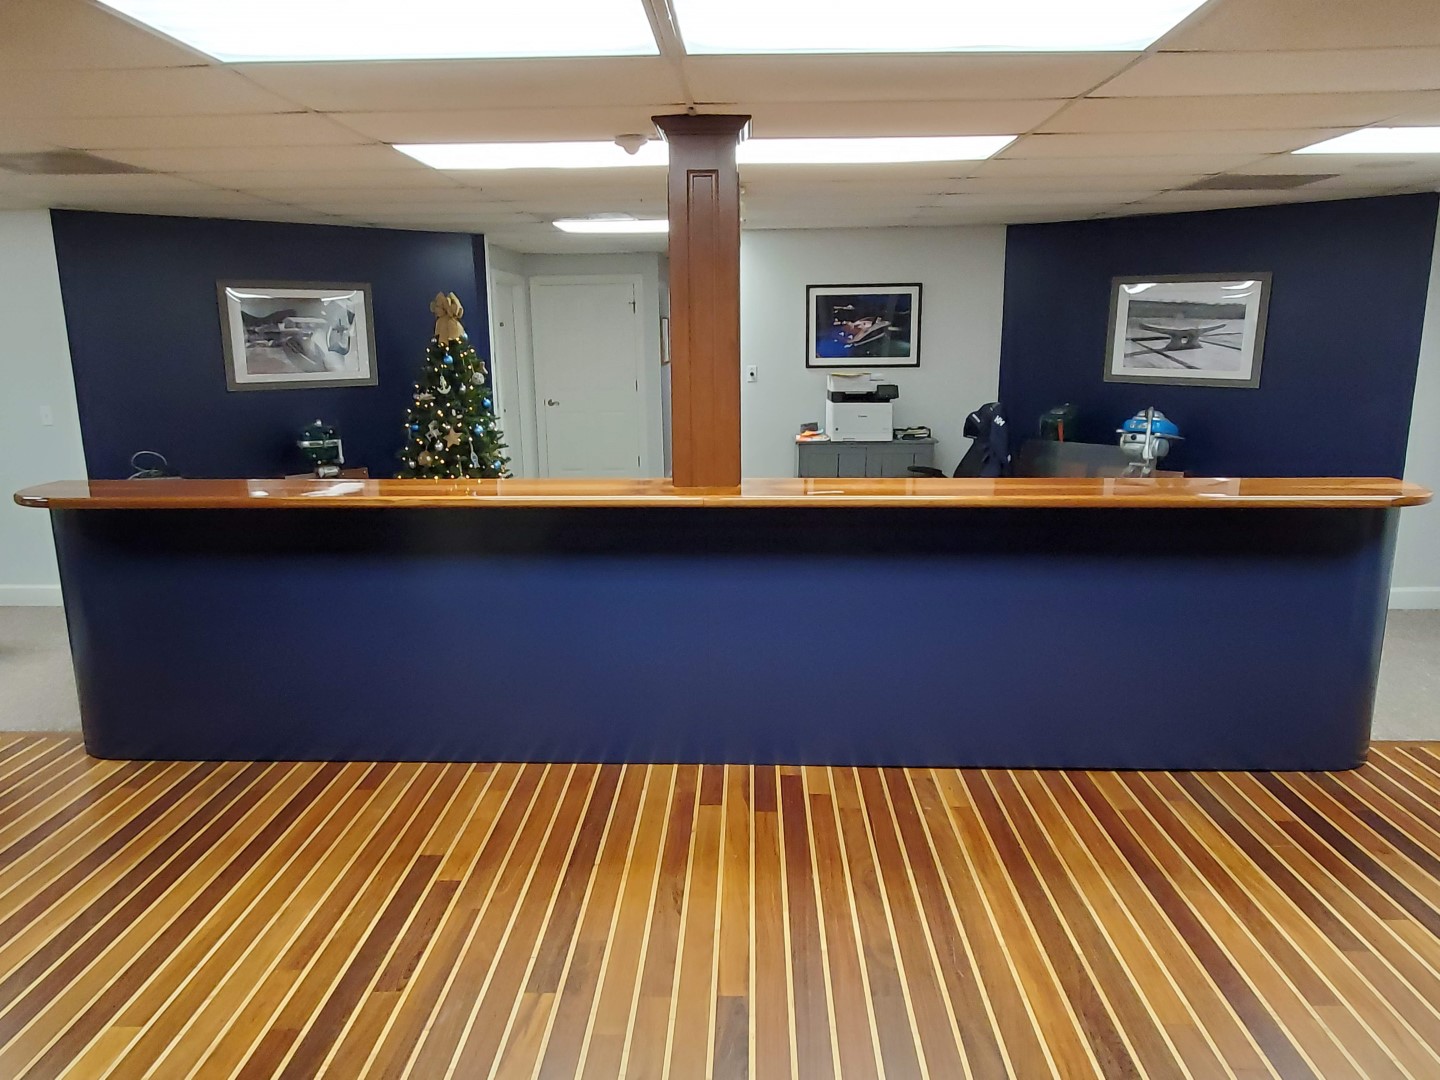
Marina reception desk build
I was contacted by Hideaway Bay Marina on Lake Lanier in Georgia about building a large reception desk for them. They sent me a sketch of what they were looking for which was a great start. I created my own chicken scratch sketches which later were used as the basis for the 3d renderings. With a little bit of back and forth, we were able to refine the details.
Building the bar
After approval, it was go time. I started by breaking down the plywood into rough sized panels that were slightly oversized of the final dimension. The first big job to tackle was the reception bar. The bar is 10 inches thick, 42 inches tall, and each section was 8′-6″ long and weighed around 250 lbs. I built the framework out of 3/4″ plywood and then applied 1/2″ plywood to the blue side and 3/4″ mahogany plywood to the desk side. The end of each section was radiused with a 10″ radius.

Bending the plywood
To bend plywood around the radius, I opted to kerf the back of a sheet of plywood until it was flexible enough to make the bend. I then glued it in place with thickened epoxy and also filled in the kerfs on the back side with the same thickened epoxy. The kerf lines did telegraph through to the face veneer but with a little bit of block sanding I was able to fair out the radius.
Building the cabinets
After the bar was built, I then built the three cabinets with their drawers. The cabinets were made from 3/4″ mahogany plywood. I opted to fasten them together with pocket screws as this would be solid and it would keep all of the fasteners hidden. Many other methods would require fastening through the face of the plywood and I wanted to avoid that. With the cabinet boxes built, I built the drawers.
The drawers
The drawers were built from 1/2″ prefinished maple plywood. I edgebanded the top edges of the drawers with maple edgebanding. The sides of the drawers were rabbeted to accept the front and backs and the drawers were glued, nailed, and screwed together. This is a quick and clean style of assembling drawers that is solid. I’ve had to disassemble drawers built this way and they did not want to come apart! It is clean because all fasteners are in the front and back panels, which you never see. When you open the drawer and look at the side of the drawer box, there are no fasteners or fastener holes. Clean. With the boxes done, I built and edgebanded the drawer fronts.

Mahogany hardwood
Next, it was time to mill some hardwood. The desk tops all have solid edging and all of the panels have solid edges at the corners. Also, there’s lots of cleats to hold everything together. I jointed/planed/ripped/drum sanded all of pieces to their respective sizes. With the milling completed, I attached the solid edging to the countertops. Next I attached the solid edging to the ends of the courtesy panels. Lastly, I predrilled and attached cleating to the panels as necessary.
Dry fit
It was time for a dry fit. I set up and fit everything together. While I was building each of the components, I installed leveling legs. As part of the dry fit, everything was leveled and trued up. I had left a few of the panels slightly oversized, and with everything in place I was able to get my final dimensions and cut them to size. The desk is now completely set up minus the bar tops. I disassembled it and then turned my sights on the bar top.
Book matching
The bar tops are made from 3/4″ mahogany plywood with solid mahogany edging. I was able to cut two pieces from the same sheet of plywood and line up the grain perfectly so that they are identical. This is called book matching. Although much of this joint would be cut out to fit around the column, it provides for a professional look. After building the bar tops, everything was sanded in preparation for finishing.
Applying the finish
All of the components except the bar tops were sprayed with conversion varnish. Conversion varnish is a coating that is widely used in commercial applications and is fast drying and hard wearing. It is also chemical resistant. I opted to go for a high gloss finish on the bar tops. This was not part of the bid. It was bid with a conversion varnish open grained satin finish. A grain filled high gloss finish is a lot more work. But I visualized the bar with it and I knew it needed it. It would be the crown jewel of this desk. To achieve the high gloss, I sprayed on 15 coats of a gloss urethane and once it cured, I wet sanded to 1500 grit and then polished it until it shined.

Delivery – 650 miles away
I loaded all of the parts into my enclosed trailer and made the trek to Atlanta. My wife has family near Atlanta so we were able to visit while we were there. Thanks to a good dry fit, installation went smoothly. I had left a few of the components long as they needed to get fit up to the column in the center of the room. Using my vacuum attached track saw, I was able to scribe the components around the column.
One gorgeous desk
It was nice to stand back and look at the completed desk. The proportions are right for the size of the room. With the teak and holly floor, the whole thing is just gorgeous. I installed that floor 7 years ago so it was really neat seeing some of my old work meeting up to the new desk.


No responses yet