Creating the Pipiomaka table
The Pipiomaka table was a design that I came up with and didn’t know if it could even be built. I had never seen wood bent in this manner. But it didn’t matter. I had the vision in my head and I can be stubborn when it comes to figuring out how to make it work. Using AutoCAD Fusion 360, I modeled the table and got a feel for the curves and proportions. I liked it. At this point I didn’t have a name for it. I was stuck on the butterfly table as the legs were butterflied open like a chef would do to a steak. I came across the word pipiomaka, which, in Hawaiian means butterfly. At least that’s what the internet said. Regardless, It stuck.


I transferred the file into Aspire which allows me to cut parts on my CNC. Using the file, I cut out the first set of forms. I decided to start with half of a leg for the prototype. Each leg section will have both legs cut from a single piece. To simplify my testing, I opted to start with only one half until I got the process down. I laid out and cut out the leg from a piece of mahogany. The leg isn’t separated from the remainder of the piece, it’s still attached on one end. This allows the leg to flow into the tabletop. I fired up the steamer and placed the mahogany inside. When it was ready, I pulled it out and did my first test bend.


A successful failure
A successful failure! Wait, what is that? That means it almost worked which means I’m on the right path. But ultimately it broke and failed. So although it failed, I learned enough to move forward with the next round of testing. Great. Based on what I learned, I opted to make a new set of forms on the opposite side of the leg. After some head scratching and designing, I cut out a few more forms. This time I used a piece of cherry for the half leg. I cut the leg free and placed it in the steam box.
So close!
I pulled it out of the steam box and manipulated the piece to the forms. Success! It worked. This was very exciting. But the curve was wrong which makes the leg too tall. It would wind up with a 24″ tall coffee table and that’s just a bit too tall. Now, I expect a bit of relaxation in the leg after it’s released from the mold, but that’s more than I’m looking for.


Forms revision 3
Back to the drawing board. Using what I’ve learned, I drew up version 3 of the forms. This time I cut out two forms to try my hand at a full double leg bend. I used a piece of red oak and cut the legs free on one end from the remainder of the piece. Into the steam box it went and I prepped for the double bend.

Another successful failure
When it was ready, I pulled it out and attempted the first double bend. Another successful failure! I’m good at those. I was able to achieve the double bend which means success. However, it took me 7 minutes after getting it out of the steam box until it was fully clamped. That’s about 6 1/2 minutes too long. It’s been said that the piece needs to be bent within 10 seconds after being removed from the steam box for it to not have any springback. If this is going to be successful, I need to go back to the drawing board to figure out a way to cut my time way down.


Rethinking the forms
What I realized is the forms I have weren’t right. They’re the reason I’m spending so much time clamping. The shape is correct, so that part can remain. After many days obsessing over this over in my head, I came up with the solution. I need to be able to perform the bend with a single clamp on each leg. To do this, I would hook the free part of the leg and roll the form down until the far end reached the work bench. At that point I’d clamp it and move to the other leg. I re-drew the forms and also modified the curve slightly to be a touch shorter. The last set of legs was too tall still. I cut out revision 4 forms and made another red oak leg. Into the steam box it went and the waiting began.

It worked!!
When the leg was ready, I took it out of the box and bent it to the forms. This time I was able to get the bends in just over 1 minute. Success! I stood back and marveled at the leg for way too long. It has taken me so long to get to this point, I couldn’t help but to enjoy the moment. The legs wound up with slightly less height than I wanted, so I’ll modify these forms to be a touch taller, but that’s an easy fix.


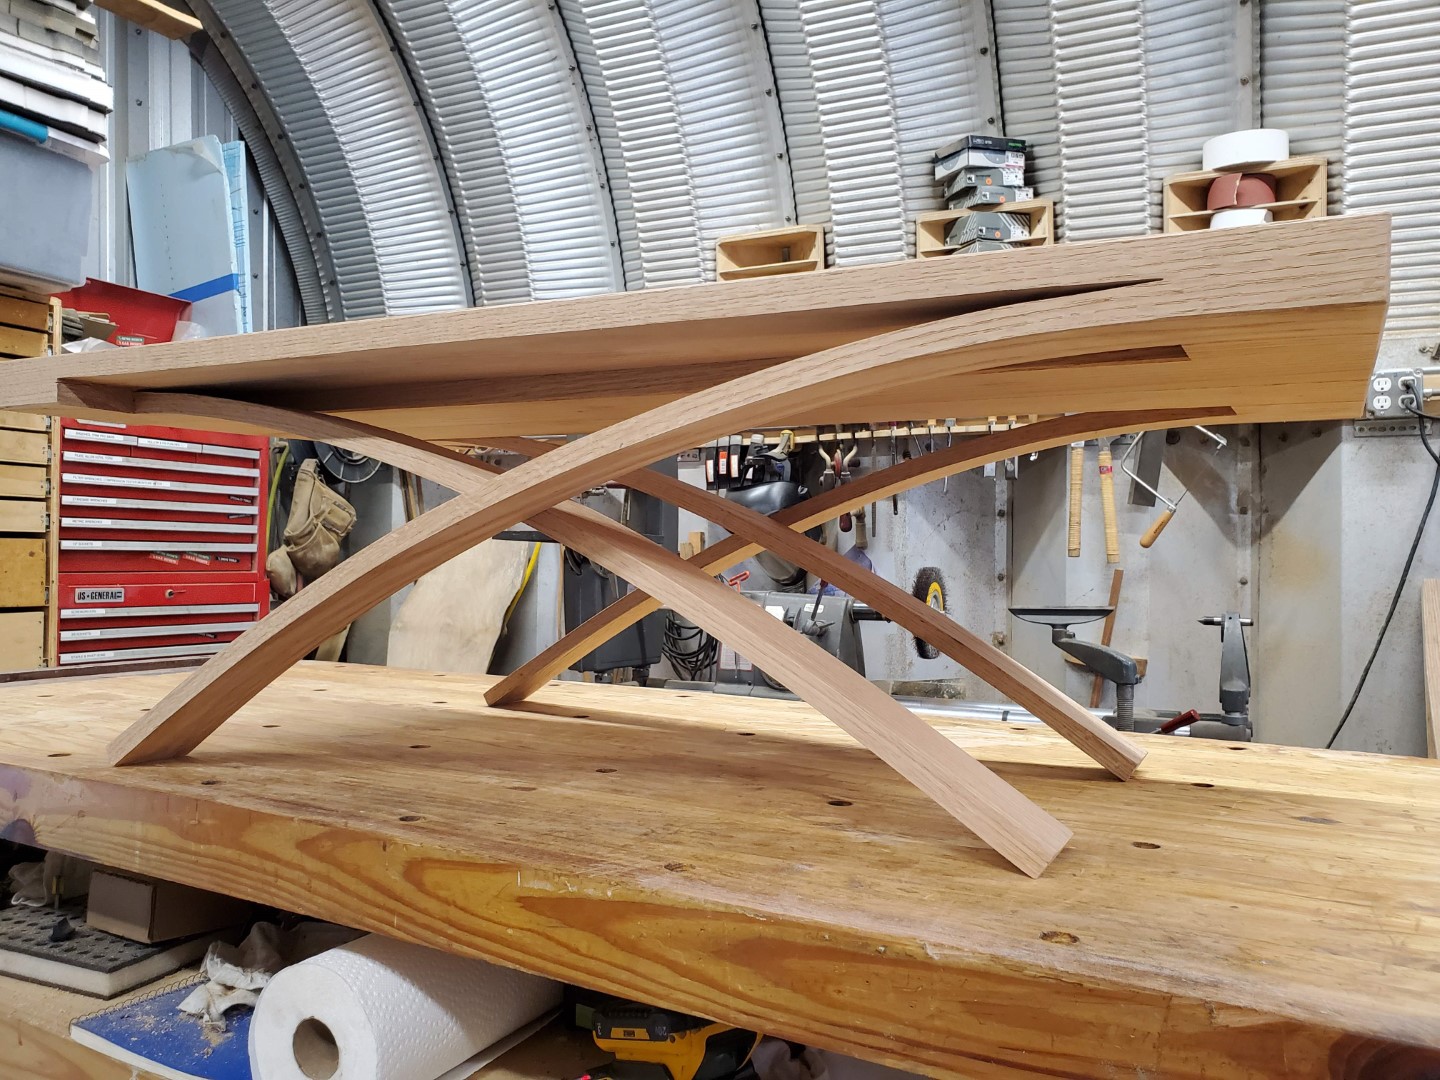
The first pair of legs
I modified the forms and prepared two sets of opposite legs. The pairs of legs are mirrored to create the design esthetic that I’m looking for so I prepared two opposing leg blanks and fired up the steamer. I successfully bent both pairs of legs. I was now well on my way to building the first Pipiomaka table.
Final Shaping
After a few days, the moisture content in the legs had normalized and I began to work and shape the legs. Each leg cupped slightly from the steam bath so I used a spokeshave and card scraper to flatten them back out. I meticulously shaped the point where the leg meets the top to have a crisp, clean end. Lastly, I milled up two more boards for the middle of the table. I joined all of the pieces together with dominos and dry assembled it for the first time. It was glorious! It started as a vision in my head which then found its way to paper, then to a 3d rendering, and finally through many failures into the beautiful table that stood before me.

For sale
I now offer the Pipiomaka table for sale and the listing can be found here. It will be built to order and I’m open to customization options. Feel free to reach out with any questions you may have. Thanks for reading!
Comments are closed