How it began
I was approached by a new brewery in town, Steam Horse Brewing Company, to see about building them some beer sampler trays and some tap handles. The prerequisites were simple: it had to resemble a train, it had to carry 4 of a certain size glass, and it had to be able to be wrote on with chalk. Lastly, they needed 20 of them done in less than 3 weeks to be ready for their grand opening. OK, but before 20 can be made, I have to come up with a design and make a sample for approval before I can even get started building. The back and forth of the design process usually takes 3 weeks. I got this.
A good logo goes a long way
I had their graphic designer send me over a high quality copy of their logo, which is a steam engine. Real cool. I stared at it for a while and pictured different configurations for making it into a functional and good looking flight tray. I imported the logo into my design software and started playing with different concepts. Having done other samplers in the past, I overlaid one of the past layouts over the top of the new logo to get a rough idea of size. With that done, I was liking the lines on the “pilot”, otherwise known as the cow catcher or cow plow on the front of the train.

Making the outline of the tray
I expanded the lines that made up the outline of the cow plow and the general layout for the beer sampler trays was born. Next up was the handle. I liked the shape of the chimney on the top of the steam engine so I expanded that outline to become the handle. That worked great. To more mimic the design of the chimney, I carried the emblem on the chimney of the logo up to the handle. It was starting to look good but wasn’t quite there yet.
It needs lines!
Lines. It needed lines. The same lines that are on the cow catcher needed to be on the board. I figured that this was best achieved with contrasting material. I could now picture the final product in my head and it was awesome. Unfortunately, inlaying a second material into the boards is extremely tedious and slow work and time wasn’t on my side. I laid out the lines in the software and now I was ready to do a trial run.

The initial design of the Steam Horse beer sampler tray
Let’s make some sawdust
The first step was prepping the raw material. I had a few large mahogany boards that were too wide to fit through my planer. No problem, I used the CNC to flatten out both sides and to bring them to the final thickness.

Designing the Steam Horse beer sampler trays in Aspire while prepping the mahogany for the CNC
Once to thickness, I cut out the inlay lines and also the outside profile. The outside profile didn’t need to be cut yet, but it helped me picture the final shape as I went along.

Flattening out both sides of the rough sawn mahogany on the CNC

Cutting out for the maple inlays and the outline of the flights trays.
With the inlay lines cut, I prepped some maple stock to fit snug into the dados (or grooves) cut by the CNC.

Starting to layout the maple inlays
So many pieces!
Time for layout. Every angle and intersection was laid out so that once I got started cutting, I could keep on rolling. About this time my wife came to visit me in the shop. “I can’t do it” I told her. “I can’t cut 16 inlay pieces for 20 beer sampler trays and get it done on schedule.” During this same 3 week time frame I also had to put together an order of about 50 tap handles in 3 different styles. 2 of the styles were brand new and I had yet to design them. Lots of pressure. Good. I like challenges.

Laying out the angles. Lots of pieces, lots of angles.
I worked my way around the outside edges first. I would cut one angle on the piece, set it in place, then mark it for the length before cutting the second angle. Each side of the beer sampler tray is a mirror image of the other. That means that a piece cut for one side will fit the other. That saves a bit of time there!

A few more maple inlay pieces installed
Having completed and glued in the inlays, I sanded them down flush. This was the first indication of the final product and it looked amazing.

The maple inlays have been glued in and sanded flush
The mahogany stock was then placed back on the CNC where the logo was engraved and the holes for the glasses was cut out.

Finishing up
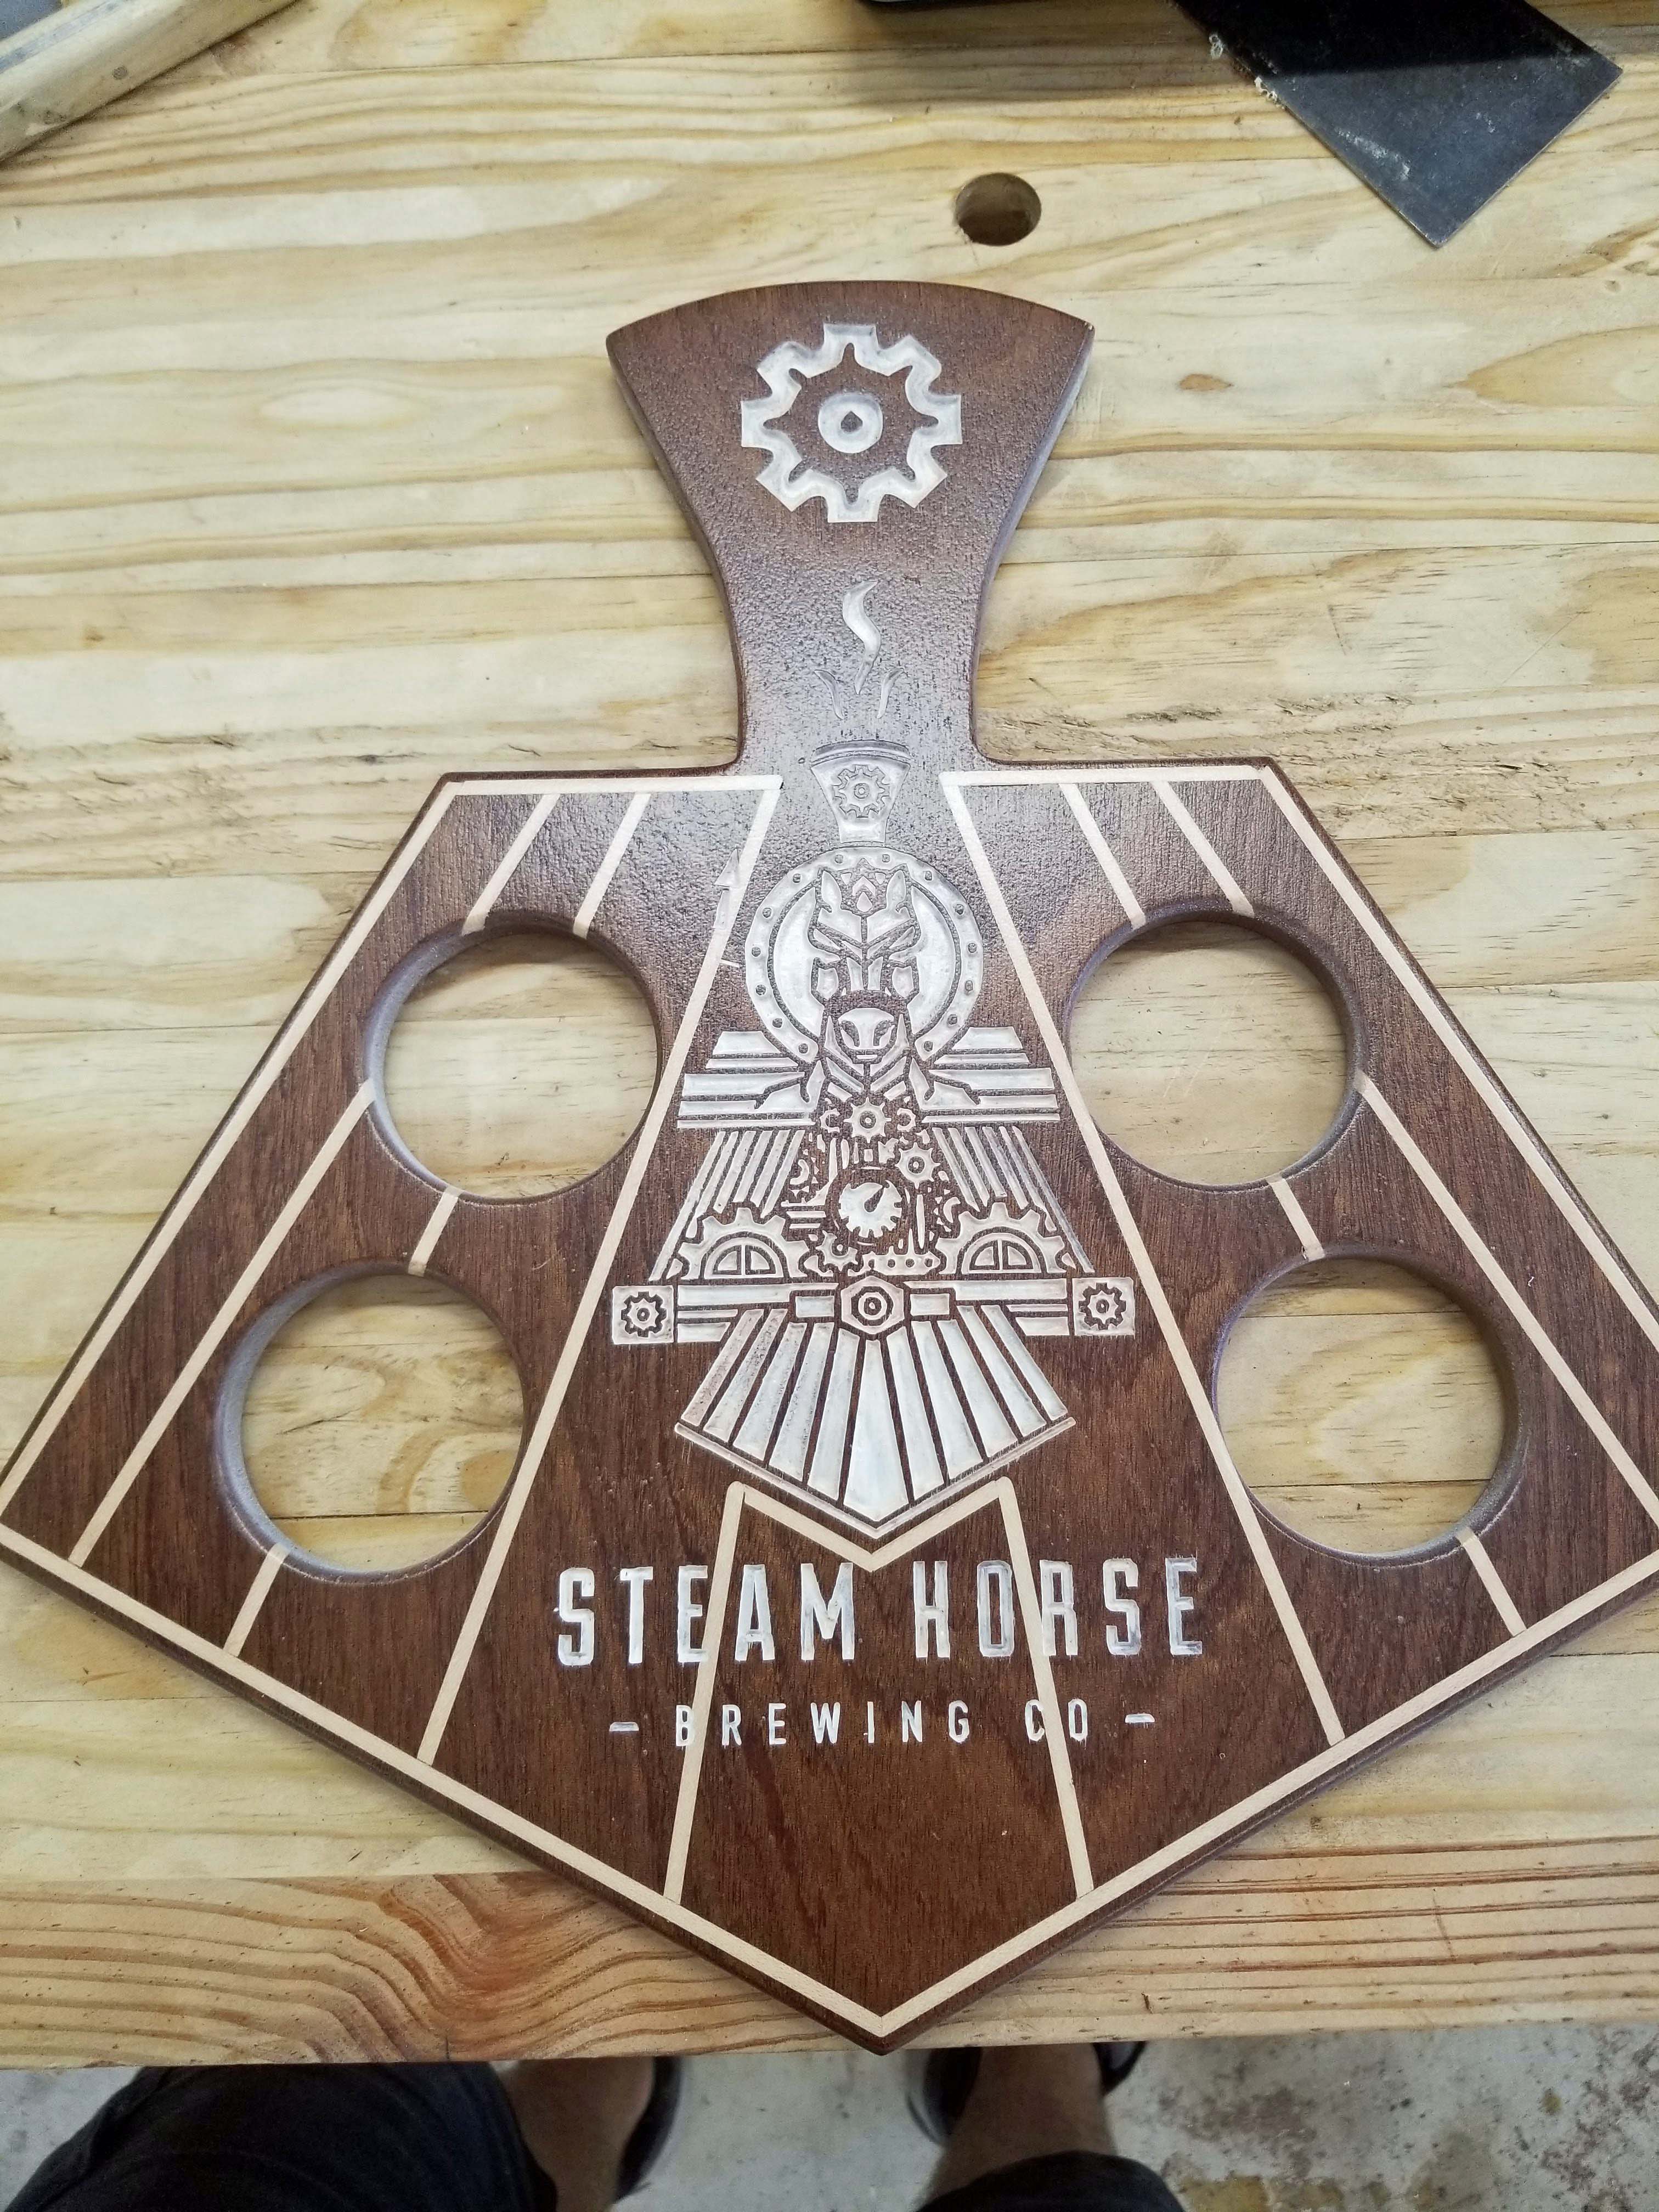
After the CNC, I sanded all sides of the tray and then the edges got rounded over with a router. Next, I sprayed the pieces with a coat of vinyl sealer and then clear conversion varnish. After two coats, I came back and sprayed the engraved logo portion of the trays with white conversion varnish. I let the white set up and then I sanded the excess white off of the areas around the logo leaving the engraved logo white. Another two coats of clear conversion varnish and the sampler trays were ready. They turned out just as I had pictured….awesome!

The finished beer sampler tray sample.
In review, the chimney handle was a little too large. A little scaling back was all it took to make it comfortable and easier to handle. Also, the right side of the cow catcher on the logo was closer to the inlay lines than the other side. Minimal, but it bugs me so it was adjusted before the full run of boards was done.
More to come
Here’s a sneak peak of the 20 beer sampler trays in production after the original sample had been approved. I’ll have another blog post coming soon about building them.

Steam Horse brewing company beer sampler trays in finish
Comments are closed